
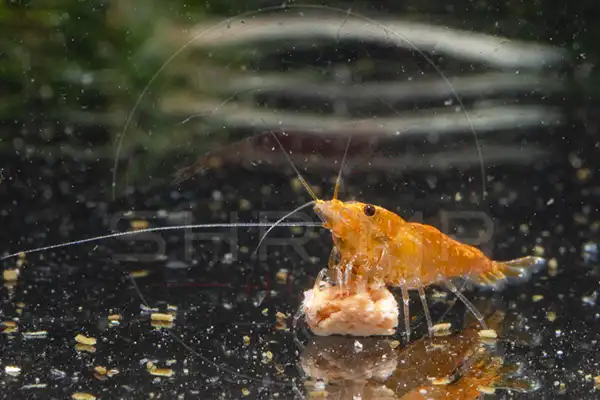
Neocaridina shrimp are one of the easiest and most rewarding things you can keep in an aquarium, but almost every early loss comes down to the same few mistakes made before the shrimp even arrive. This guide walks through setting up a first shrimp tank the way we do it here at Shrimp Hub, step by step, so your shrimp settle in, colour up and start breeding.
What you need
- A tank of 20 litres or more. Neocaridina can live in smaller tanks, but more water stays more stable and is much more forgiving while you learn.
- A sponge filter and air pump. Powered filters can suck in baby shrimp. An air-driven shrimp-safe sponge filter is gentle, cheap to run and grows biofilm for shrimp to graze on.
- A small heater (optional). Neocaridina are happy at 20–26°C. A heater set to about 22°C keeps things steady through a UK winter.
- Substrate. Plain sand or gravel is fine. A dark substrate shows off colour best.
- Plants and moss. Java moss, Java fern, Anubias and floating plants are easy and give shrimp food and cover.
- A light on a timer for around 7–8 hours a day.
- Dechlorinator for every drop of tap water that goes in.
- A liquid test kit for ammonia, nitrite and nitrate, plus GH and KH if you can.
- A lid. It keeps shrimp in and keeps aerosols and household sprays out.
Step 1: Set up the tank
Rinse the substrate, add any wood or rock, and fill the tank with dechlorinated tap water at room temperature. Fit the sponge filter, start the air pump and set the heater if you’re using one. Put the tank somewhere away from direct sunlight and radiators, where you’ll see it every day.
Step 2: Plant it heavily
Plants do more for a shrimp tank than anything else. They soak up waste, keep water stable and grow the biofilm shrimp eat all day. Tie moss and Java fern to wood or stone, push stem plants into the substrate and add a few floating plants to soften the light. If you feed your plants, use a copper-free fertiliser: copper is deadly to shrimp even in amounts fish don’t notice. Our sister site Aquafertz has a simple guide to feeding a new planted tank and a list of easy aquarium plants for beginners.
Step 3: Cycle the tank
This is the step people most often skip, and the main reason new shrimp die. A new tank needs time to grow the bacteria that break down ammonia and nitrite. Add a small, steady source of ammonia, such as a pinch of fish food every couple of days, and test the water every few days.
Cycling usually takes 4–6 weeks. The tank is ready when you get 0 ppm ammonia and 0 ppm nitrite on several tests in a row, with some nitrate showing. Don’t add shrimp before then, even if the water looks clear.
Step 4: Check your water
Neocaridina are flexible, and most UK tap water suits them once it’s dechlorinated. Aim for pH 7–7.5, GH 8–10, KH 4–6 and TDS around 250–300 ppm. Stable water matters far more than perfect numbers, so avoid chasing readings with chemicals. Our shrimp care checklist covers the full set of checks.
Step 5: Order and acclimatise your shrimp
Start with at least 10 of one colour. A group settles faster and gives you a mix of males and females. If you want to breed a colour line, keep to one colour per tank, because different Neocaridina colours cross-breed. For a colourful display tank instead, a Rainbow Mix gives you six colours in one bag. You can browse every colour on our Neocaridina shrimp page.
When your shrimp arrive, open the box straight away and check the bags. Then drip acclimatise them:
- Float the sealed bag in the tank for 10–15 minutes to match temperature.
- Tip the bag, water and shrimp into a clean bucket or bowl.
- Run airline tubing from the tank, tie a loose knot in it, and let tank water drip in at about one drip per second.
- After 60–90 minutes, when the water has roughly tripled, net the shrimp out and place them in the tank. Don’t pour the bag water in.
Step 6: The first few weeks
- Expect them to hide. New shrimp often look pale and stay out of sight for a few days. That’s normal.
- Feed sparingly. A mature planted tank feeds them most of what they need. Give a little shrimp food a few times a week, and only what they finish in about two hours.
- Change water little and often. 10–15% a week with dechlorinated water at the same temperature keeps things stable.
- Watch for berried females. Once settled, females carry eggs under their tails for around a month before tiny shrimp hatch.
Common first-tank mistakes
- Adding shrimp before the tank has fully cycled.
- Using a fertiliser, plant treatment or medication that contains copper.
- Forgetting dechlorinator on top-ups as well as water changes.
- Overfeeding, which fouls the water and fuels algae.
- Keeping shrimp with fish that will eat them. Most community fish will, especially the babies.
- Big, sudden water changes that shift temperature or hardness overnight.
Got a question before you order? Have a look at our questions and answers or get in touch. We’re always happy to help you get your first shrimp tank right.
